
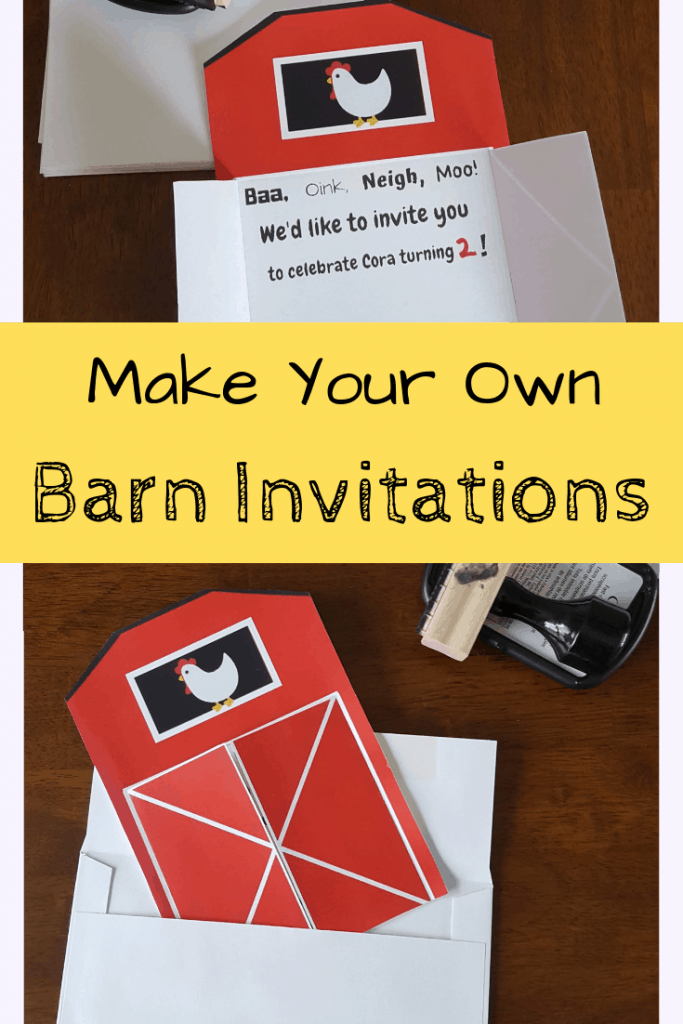
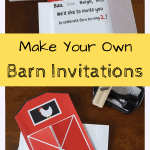
Barn Birthday Invitations
Sick of trying to find the perfect farm-themed birthday invitations? Not looking to spend a lot of money on invitations for a child’s birthday party? I hear you!
I’m a frugal party planner, especially when it comes to birthdays my children won’t even remember. I made these invitations in Canva, printed them off, and with a little cutting and some glue dots I think they turned out pretty good.
Below I’ve written instructions for how to create your own easy and cheap barn invitations.
This post contains affiliate links. Please see affiliate disclaimer here.
Step 1: Customize
First, you need to customize the invitation. I would recommend creating an 11 x
Add a rhyme to make the invitation catchy.
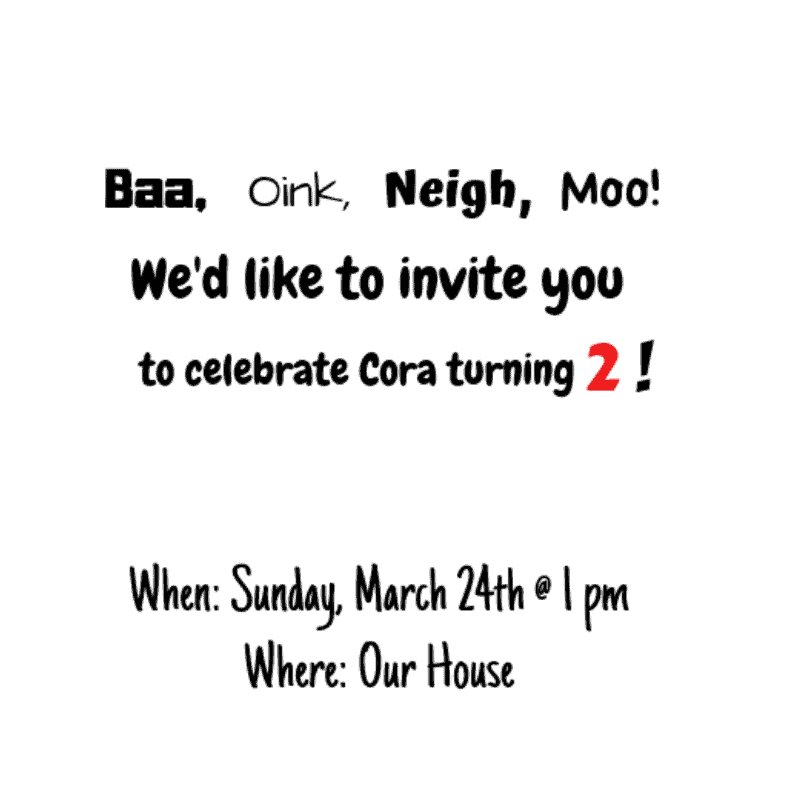
Example: If the child is turning one you can rhyme with the word fun – “We’d like to have some fun to celebrate (kid’s name) turning 1!”
Make sure to include the child’s name and age. Also, write out the party details (where, when). If you need people to RSVP you can add this information as well.
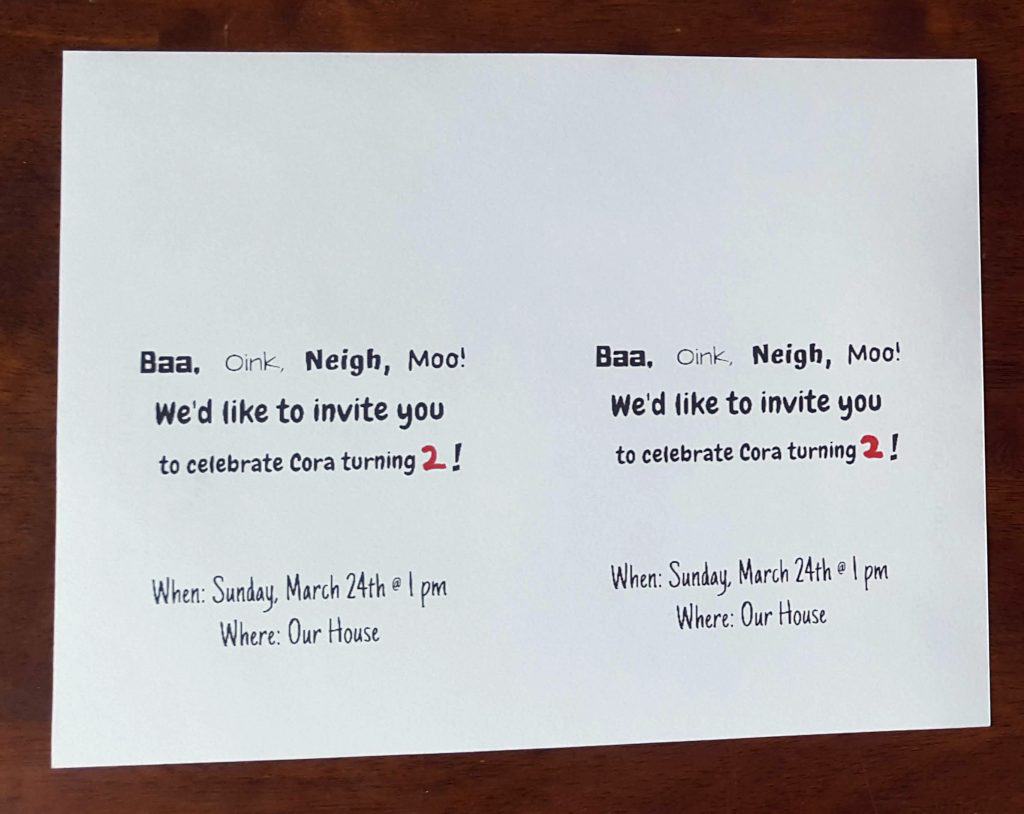
Have the information copied so there are two identical sets on the document and download as a PDF.
Step 2: Print
Calculate how many invitations you will need to send and divide that number in half, that is how many pages of invitation wording you need to print.
Tip: I printed mine on cardstock paper so the invitations would be less flimsy.
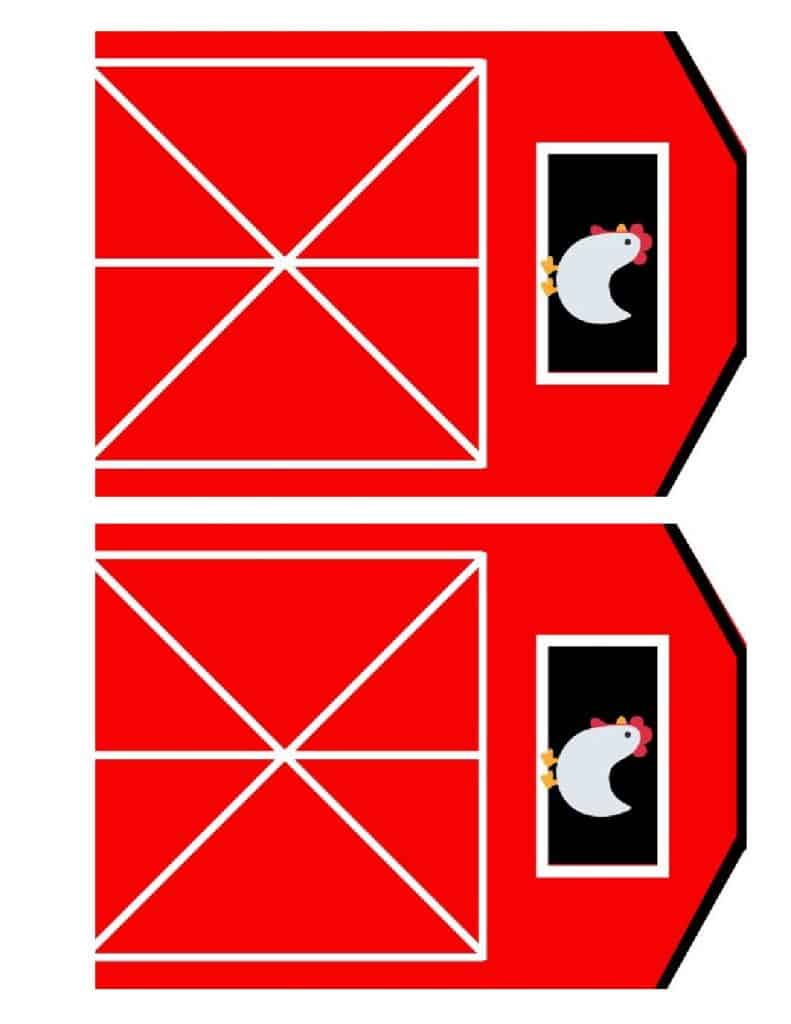
Then print the same number of Barn PDF pages (click on
Step 3: Cut
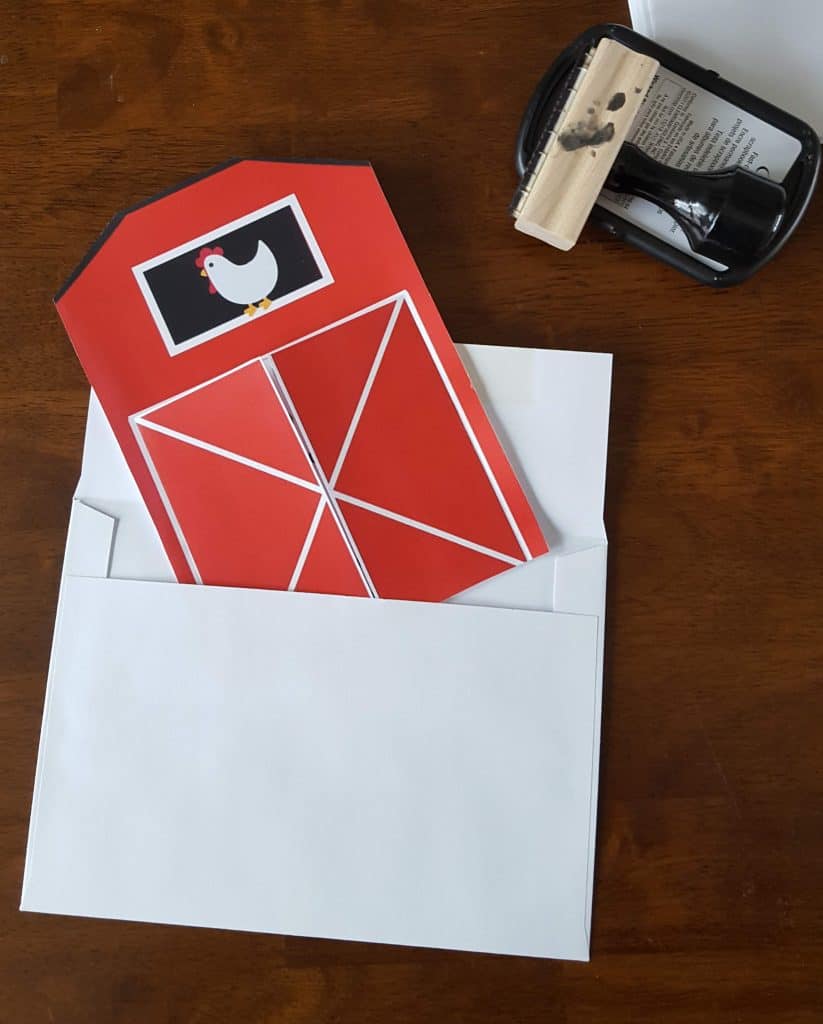
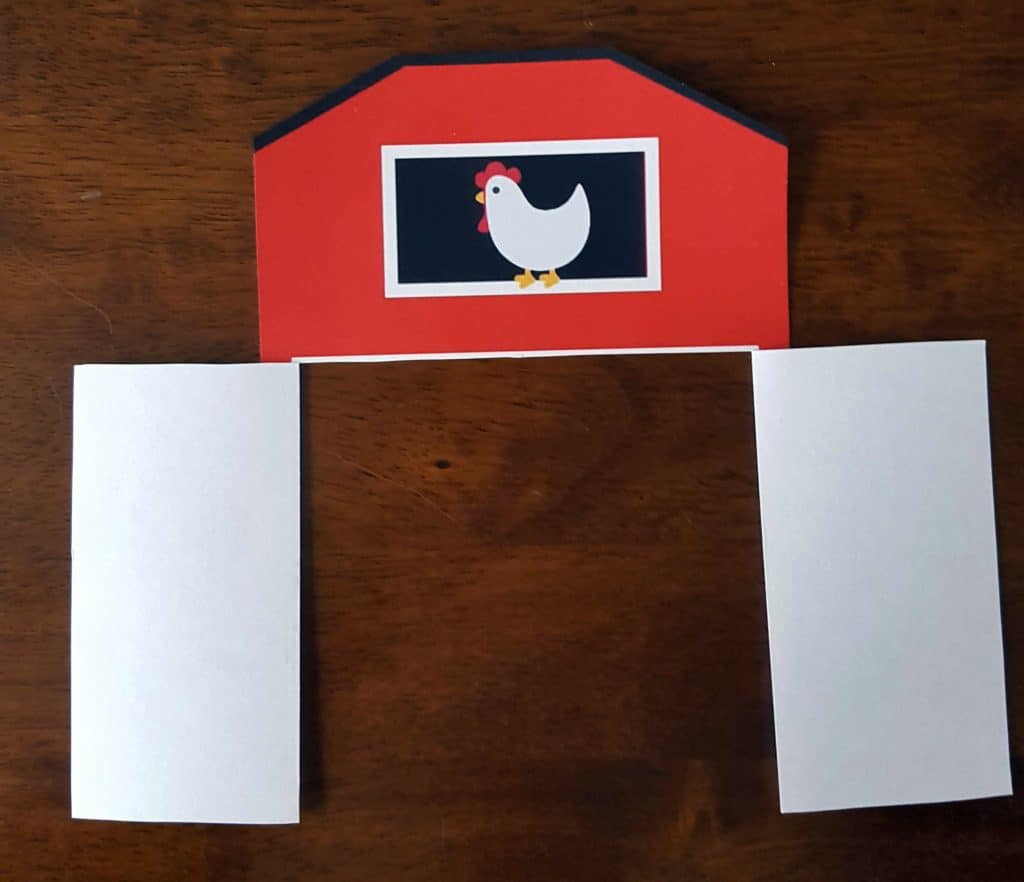
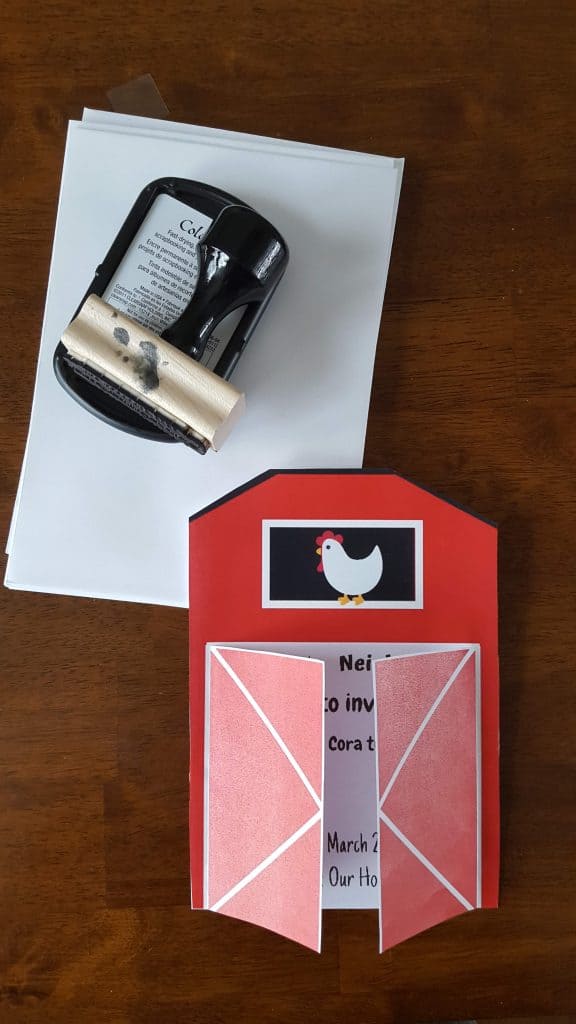
Cut out each barn. Then cut down the center of the barn doors and along the top of the barn doors so that they open. Fold back the doors to make an even crease.
Step 4: Glue
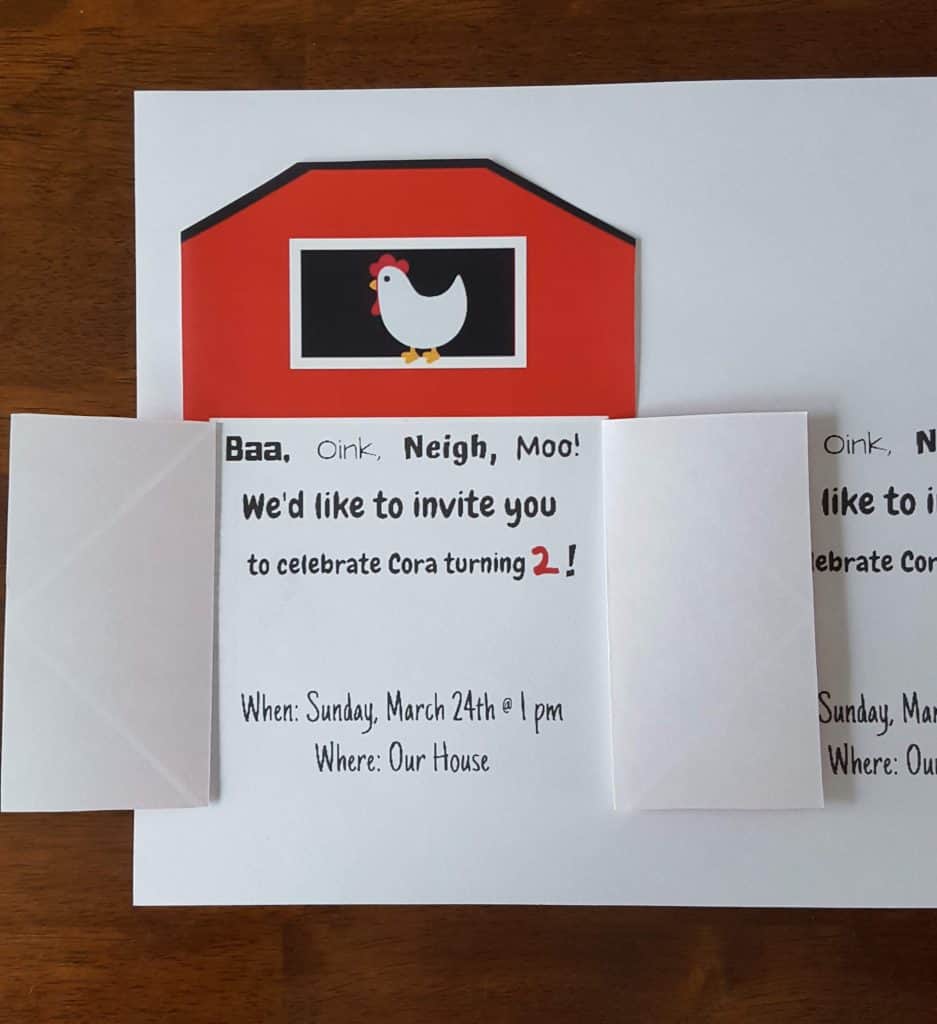
Center each barn door opening over the invitation wording and using glue dots adhere the barn to the paper with the wording on it. I also used some double-sided tape for the roof section of the barn. Cut the barn shape out again.
Step 5: Stuff/Address/Send
I had a bunch of blank envelopes left over from previous mailings that I was able to use to send out the birthday invitations (yay – free!).
I hope these instructions were helpful!
Need more inspiration for a farm birthday party? Check out my post on how to make a simple pig cake.
Related Posts:


1 COMMENT
Leave A Comment

Farm Themed Birthday Party - planningforkeeps.com | 1st Jul 20
[…] I made the birthday invitations myself. Here are all the instructions for how to make DIY barn invitations. […]